HUD - Thinking Through Making (And Some Renders) - Honours Blog 33
- Jamie Burton
- Apr 28, 2020
- 2 min read
Updated: May 4, 2020
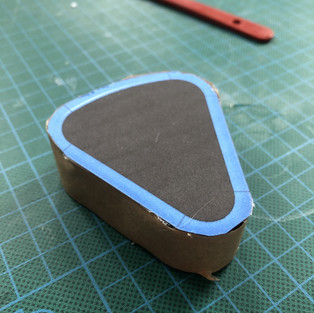
So today I've been trying to figure out just how the HUD is going to attach to the helmet, and I thought that the best way for that would be through making. I don't have access to 3D printers, workshops, any of the proper machinery but what I do have are cardboard and my old motorbike helmet. The idea behind 'thinking through making' is that it will give me a far better idea of how the product will look and feel in real life. It also gives me a good chance to see how it will fit the helmet and where any design tweaks need to be made. To get started, I needed to create a template of the HUD. To do this, I produced a CAD model, printed it out to scale and stuck it down on the cardboard. This way, I could cut out an exact shape and use this as a stencil for the other parts.

Since cardboard isn't the prettiest of materials to be working with, I found some paper packing tape to neaten up the prototype around the edges. I repeated this same process for the top 'glass' section of the HUD.


To get a proper idea of how the HUD would look on the helmet, I'd need to find a way to attach it. I decided to glue together a simple clip-on mechanism, one part for the HUD and the other for the helmet.

Overall I'm pretty happy with how the HUD looks, but not satisfied with the clip-on system, but that's to be expected. The clip system will have to be far more refined so that the HUD can sit closer to the helmet, as right now the bulky cardboard pushes it away a bit too far.

Finally, to finish things up, I decided to render the original cad model that I used for the stencil, to get a more realistic idea of how the product would appear finished.


Going forward I want to build upon the renders, adding more details such as on and off switches, battery slots any other final details or design tweaks.
That's all for today's blog,
Thanks!


Comments